按鍵控制電機正反轉速度
發布於 2023-08-16 10:56:17
本次學習如何用按鍵控制直流電機速度。
直流電機(DC—Direct Current motor)是最常見的電機類型。直流電動機通常只有兩個引線,一個正極和一個負極。如果將這兩根引線直接連接到電池,電機將旋轉。如果切換引線,電機將以相反的方向旋轉。但是為了實現正反轉,我們用雙H橋電機驅動模塊來實現。
必需品
- 1 x 面包板
- 1 x W801板
- 1 x 雙H橋電機驅動模塊(可選擇其他驅動模塊或者不用,但是不能與開發板的引腳直連).
- 1 x 直流電機
- 10 x 跳線
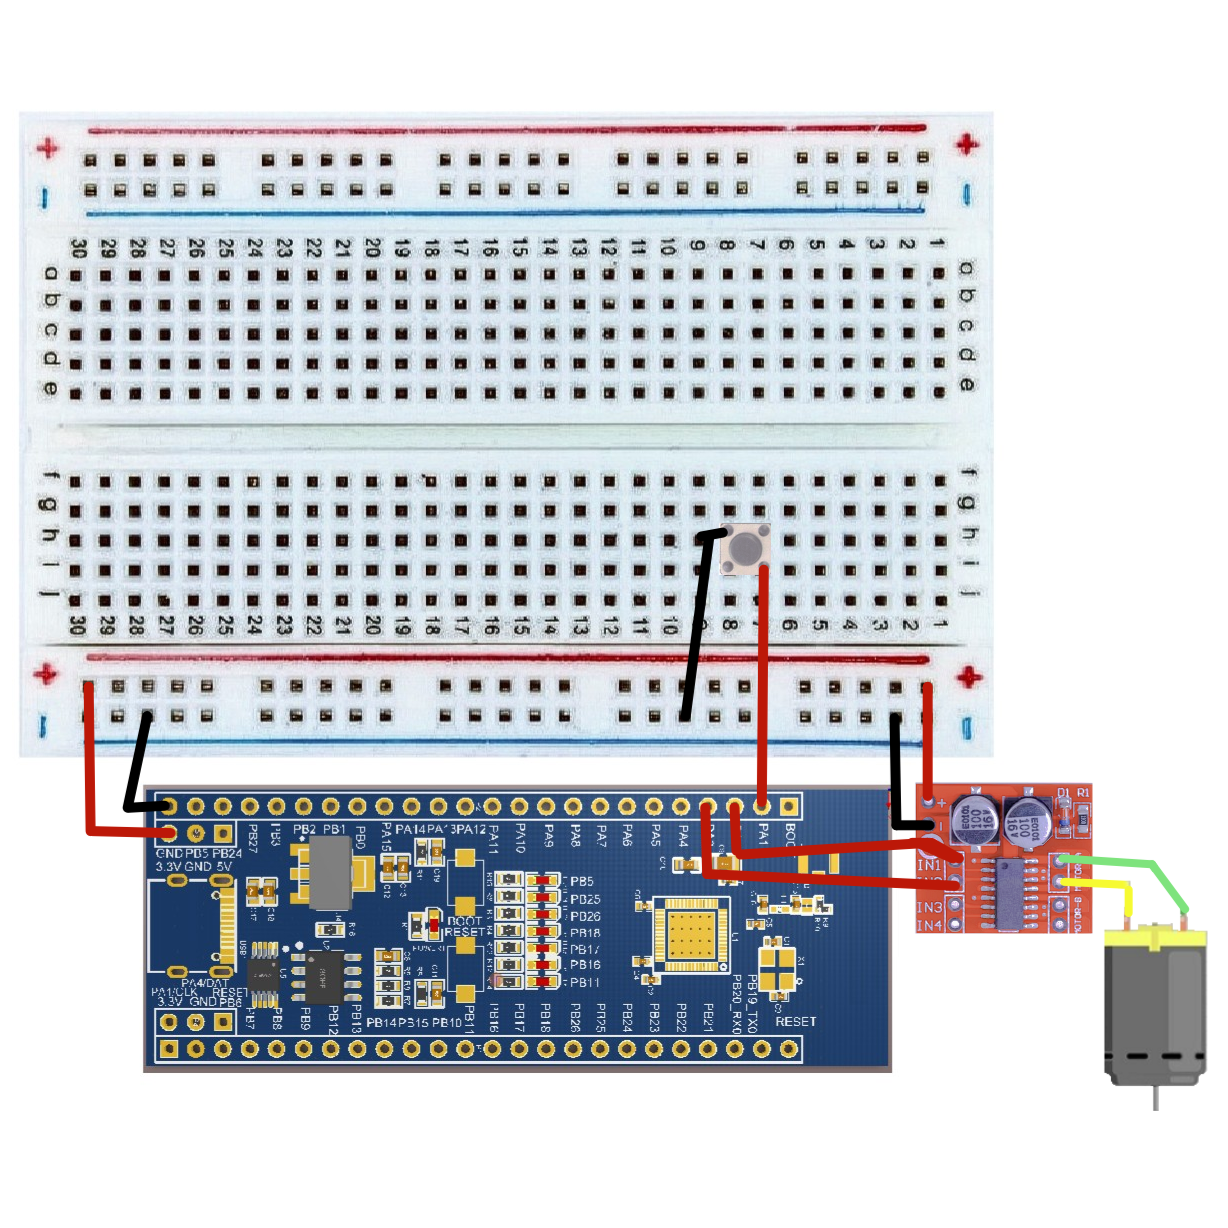
接線圖
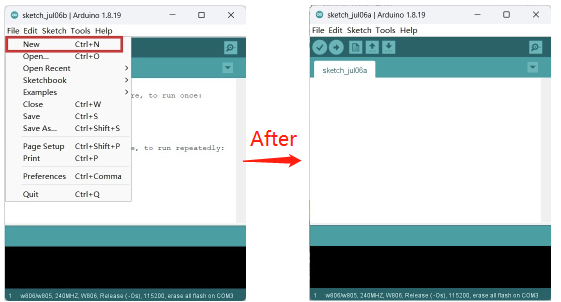
草圖
#define IN_1 PA2 // the INx the PWM pin is attached to
#define IN_2 PA3
#define BUTTON_PIN PA1 //the button pin the PA1 pin is attached to.
//void motor_compare();
//void ButtonControl();
int16_t Speed = 135; //Reduce motor speed range within visual range.
int flag = 1;  // flag bit.
int buttonState = 0;  // Indicates the state of the key (press/release).
int lastButtonState = 0;  // Indicates the status of the. last key.
unsigned long lastDebounceTime = 0;  // Indicates the time of the last key shake elimination.
unsigned long debounceDelay = 10;  // Indicates the delay time of key shake elimination.

void motor_compare(int16_t speed ) //Control motor speed.
{
  if(flag == 0)
  {
    analogWrite(IN_1,speed);
    analogWrite(IN_2,0);
  }
  else
  {
    analogWrite(IN_1,0);
    analogWrite(IN_2,speed);
  }
   Serial.printf("Motor Speed:%d\n",speed);
}
void ButtonControl() //
{
  /*
  When the key status changes each time,
  check the time interval since the last buffeting.
  If the delay exceeds the set time,
  the key status variable is updated according to the current key status
  and the corresponding operation is performed.
  */
  int reading = digitalRead(BUTTON_PIN);
  if(reading != lastButtonState)
  {
    lastDebounceTime = millis();
  }

  if((millis() - lastDebounceTime) > debounceDelay)
  {
    if(reading != buttonState)
    {
      buttonState = reading;
      if(buttonState == HIGH)
      {
        Speed += 20;
        if(Speed > 255)
        {
          Speed = 135;
          flag = !flag;
          //Serial.printf("%d\n",flag); //Detects whether to enter the program.
        }
        motor_compare(Speed);
       }
     }
   }
   lastButtonState = reading;
}

void setup()
{
  Serial.begin(115200);
  //initialize the pin as an output.
  pinMode(IN_1,PWM_OUT);
  pinMode(IN_2,PWM_OUT);
  // initialize the pushbutton pin as an input.
  pinMode(BUTTON_PIN,INPUT_PULLUP); //如果有外接按鍵小模塊,可設置為INPUT.
}

void loop()
{
  ButtonControl();
}
代碼導入步驟
首先單擊Verify驗證代碼是否正確

接著單擊Upload上傳代碼彈出保存框,在相應的位置編輯文件名並保存即可

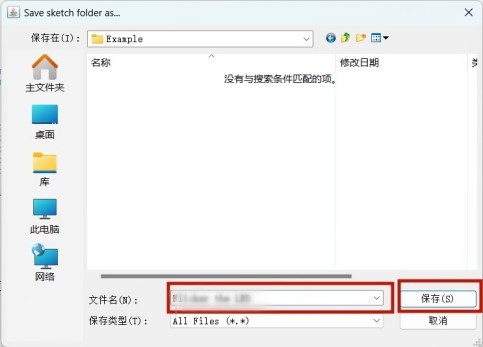
也可以如下步驟
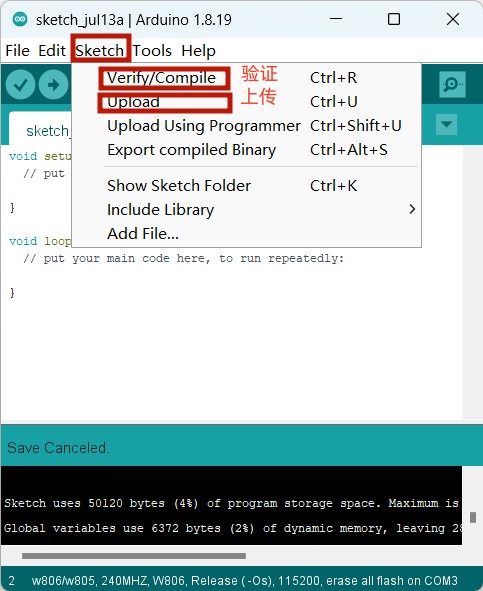
最後等待上傳需要十幾秒的時間,顯示以下即表示成功
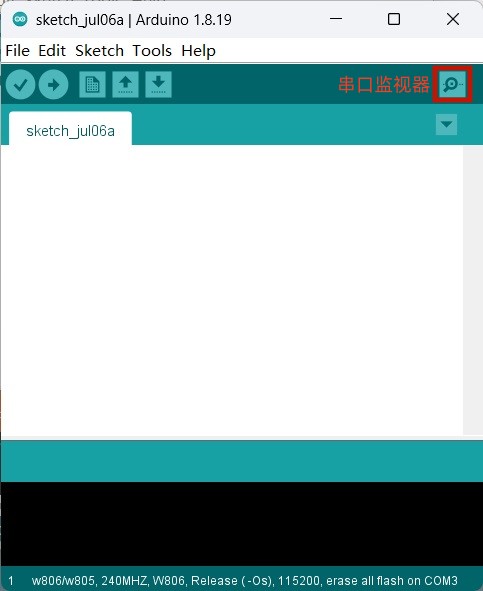
現在,通過單擊頂部綠色條右側的圖標或按Ctrl+Shift+M,在Arduino IDE中打開串口監視器看電機速度變化的值.
結果
你會看見每當按鍵按下一次,電機正轉速度在逐漸變快直至達到最大速度之後,又從正轉變成反轉並且速度逐漸加快.依次循環.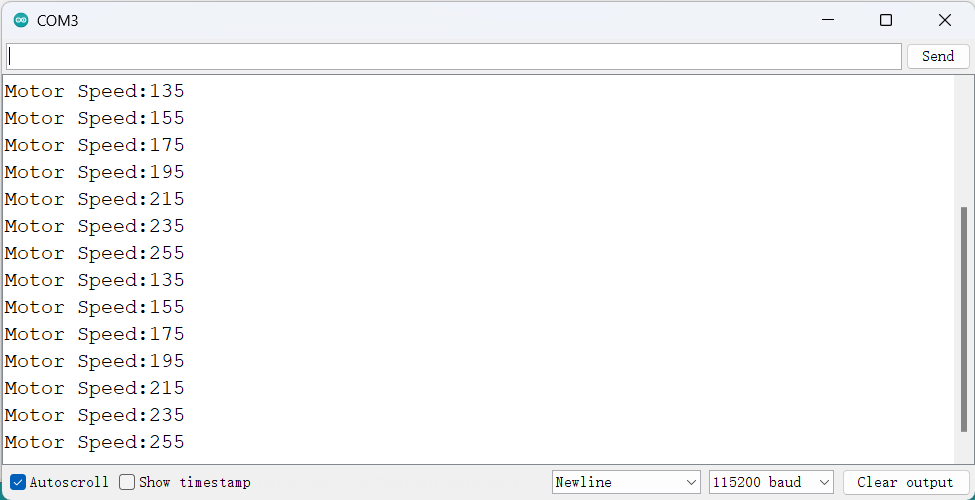
5 條評論



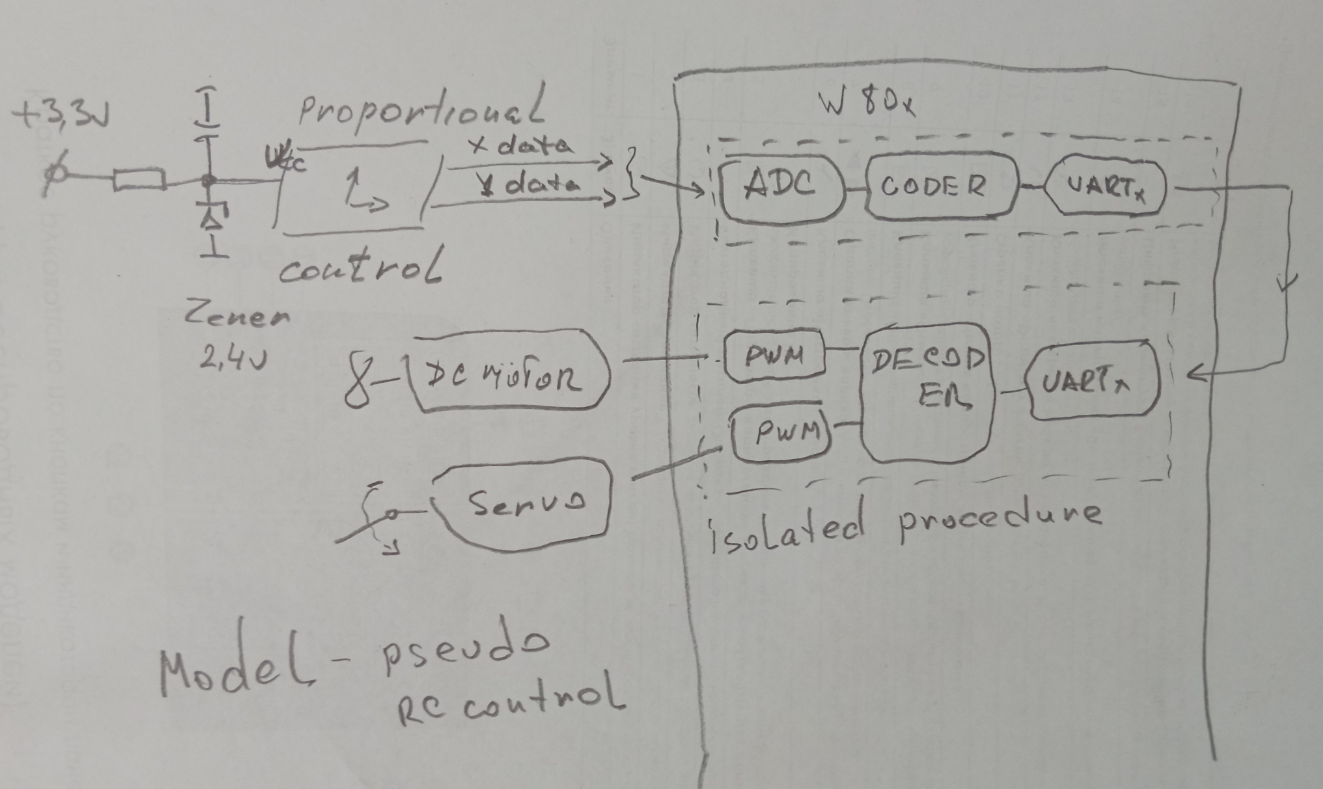
I suggest working on expanding your example. Add a servo and a proportional control element. And then you can use it as a building block for RC models. We will consider data transmission over the radio channel in the near future
@AnatolSher Well,I'll try it.
@Level Das model :)
@Level pinMode(BUTTON_PIN,INPUT);
Should be replaced with pinMode(BUTTON_PIN,INPUT_PULLUP);
Because such a button connection requires a pull-up to the power
@AnatolSher oh, indeed. Thanks for the pointer.