W801藍牙收發數據與控制設計(二)-NOTIFY
發布於 2022-04-16 17:40:46
@TOC
W801藍牙收發數據與控制設計(一)-INDICATE
W801藍牙收發數據與控制設計(二)-NOTIFY方式
本文使用環境:
主控:W801 (開發板)
兼容:W800 AIR101
一、項目概述
^^^^這篇教程接著上文繼續介紹W801的BT使用,上文使用INDICATE方式進行數據的收發,這篇文章主要采用NOTIFY方式進行數據收發。具體Indicate 和 Notify的區別,可以自己查一下,我也不是很了解這個東西。好像是 (indicate發送接收端有應答,notify接收端無應答) 。
^^^^程序功能: 和上文差不多,區別在於Indicate 和 Notify不一樣。
二、程序設計
寫在前面:本文的程序是在上文的基礎上做的改進,所以必須下載前文的程序。
==以下代碼均在wm_ble_server_api_demo.c中添加。==
1、先添加宏定義,關於notify主要有兩個地方,如下:
/* ble attr write/notify handle */
uint16_t g_ble_demo_attr_indicate_handle;
uint16_t g_ble_demo_attr_write_handle;
uint16_t g_ble_demo_conn_handle ;

//add by zxx start
uint16_t g_ble_demo_attr_notify_handle;
//add by zxx end

#define WM_GATT_SVC_UUID      0xFFF0
#define WM_GATT_INDICATE_UUID 0xFFF1
#define WM_GATT_WRITE_UUID    0xFFF2

//add by zxx start
#define WM_GATT_NOTIFY_UUID   0xFFF3
//add by zxx end2、官方的demo中只有WRITE和INDICATE,因此添加代碼characteristics :
//notify_test函數沒有任何的作用,不添加藍牙notify方式初始化會失敗。
static int notify_test()
{
    ;
}
static const struct ble_gatt_svc_def gatt_demo_svr_svcs[] = {
    {
        /* Service: uart */
        .type = BLE_GATT_SVC_TYPE_PRIMARY,
        .uuid = BLE_UUID16_DECLARE(WM_GATT_SVC_UUID),
        .characteristics = (struct ble_gatt_chr_def[]) { {
                .uuid = BLE_UUID16_DECLARE(WM_GATT_WRITE_UUID),
                .val_handle = &g_ble_demo_attr_write_handle,
                .access_cb = gatt_svr_chr_demo_access_func,
                .flags = BLE_GATT_CHR_F_WRITE,
            },{
                .uuid = BLE_UUID16_DECLARE(WM_GATT_INDICATE_UUID),
                .val_handle = &g_ble_demo_attr_indicate_handle,
                .access_cb = gatt_svr_chr_demo_access_func,
                .flags = BLE_GATT_CHR_F_INDICATE,
            }
            //add by zxx start
            ,{
                .uuid = BLE_UUID16_DECLARE(WM_GATT_NOTIFY_UUID),
                .val_handle = &g_ble_demo_attr_notify_handle,
                //這個函數不會調用,但是必須要有,
                .access_cb = notify_test,
                .flags = BLE_GATT_CHR_F_NOTIFY,
            }
            //add by zxx end
            ,{
              0, /* No more characteristics in this service */
            }
         },
    },

    {
        0, /* No more services */
    },
};3、添加tls_ble_server_demo_api_send_notify_msg 函數,只需仿照tls_ble_server_demo_api_send_msg函數進行修改即可。
//add by zxx start
int tls_ble_server_demo_api_send_notify_msg(uint8_t *data, int data_len)
{
    int rc;
    struct os_mbuf *om;

    //TLS_BT_APPL_TRACE_DEBUG("### %s len=%d\r\n", __FUNCTION__, data_len);
    //這句話要注釋掉,要不然這個代碼的邏輯不對
    //if(g_send_pending) return BLE_HS_EBUSY;

    if(data_len<=0 || data == NULL)
    {
        return BLE_HS_EINVAL;
    }

    om = ble_hs_mbuf_from_flat(data, data_len);
    if (!om) {
        return BLE_HS_ENOMEM;
    }
    //參數g_ble_demo_attr_notify_handle句柄要和characteristics 的句柄一樣
    rc = ble_gattc_notify_custom(g_ble_demo_conn_handle,g_ble_demo_attr_notify_handle, om);
    //這句話注釋不注釋都可以,我注釋了
    /*
    if(rc == 0)
    {
        g_send_pending = 1;
    }
    */
    return rc;
}
//add by zxx end
二、測試
1、app端配置
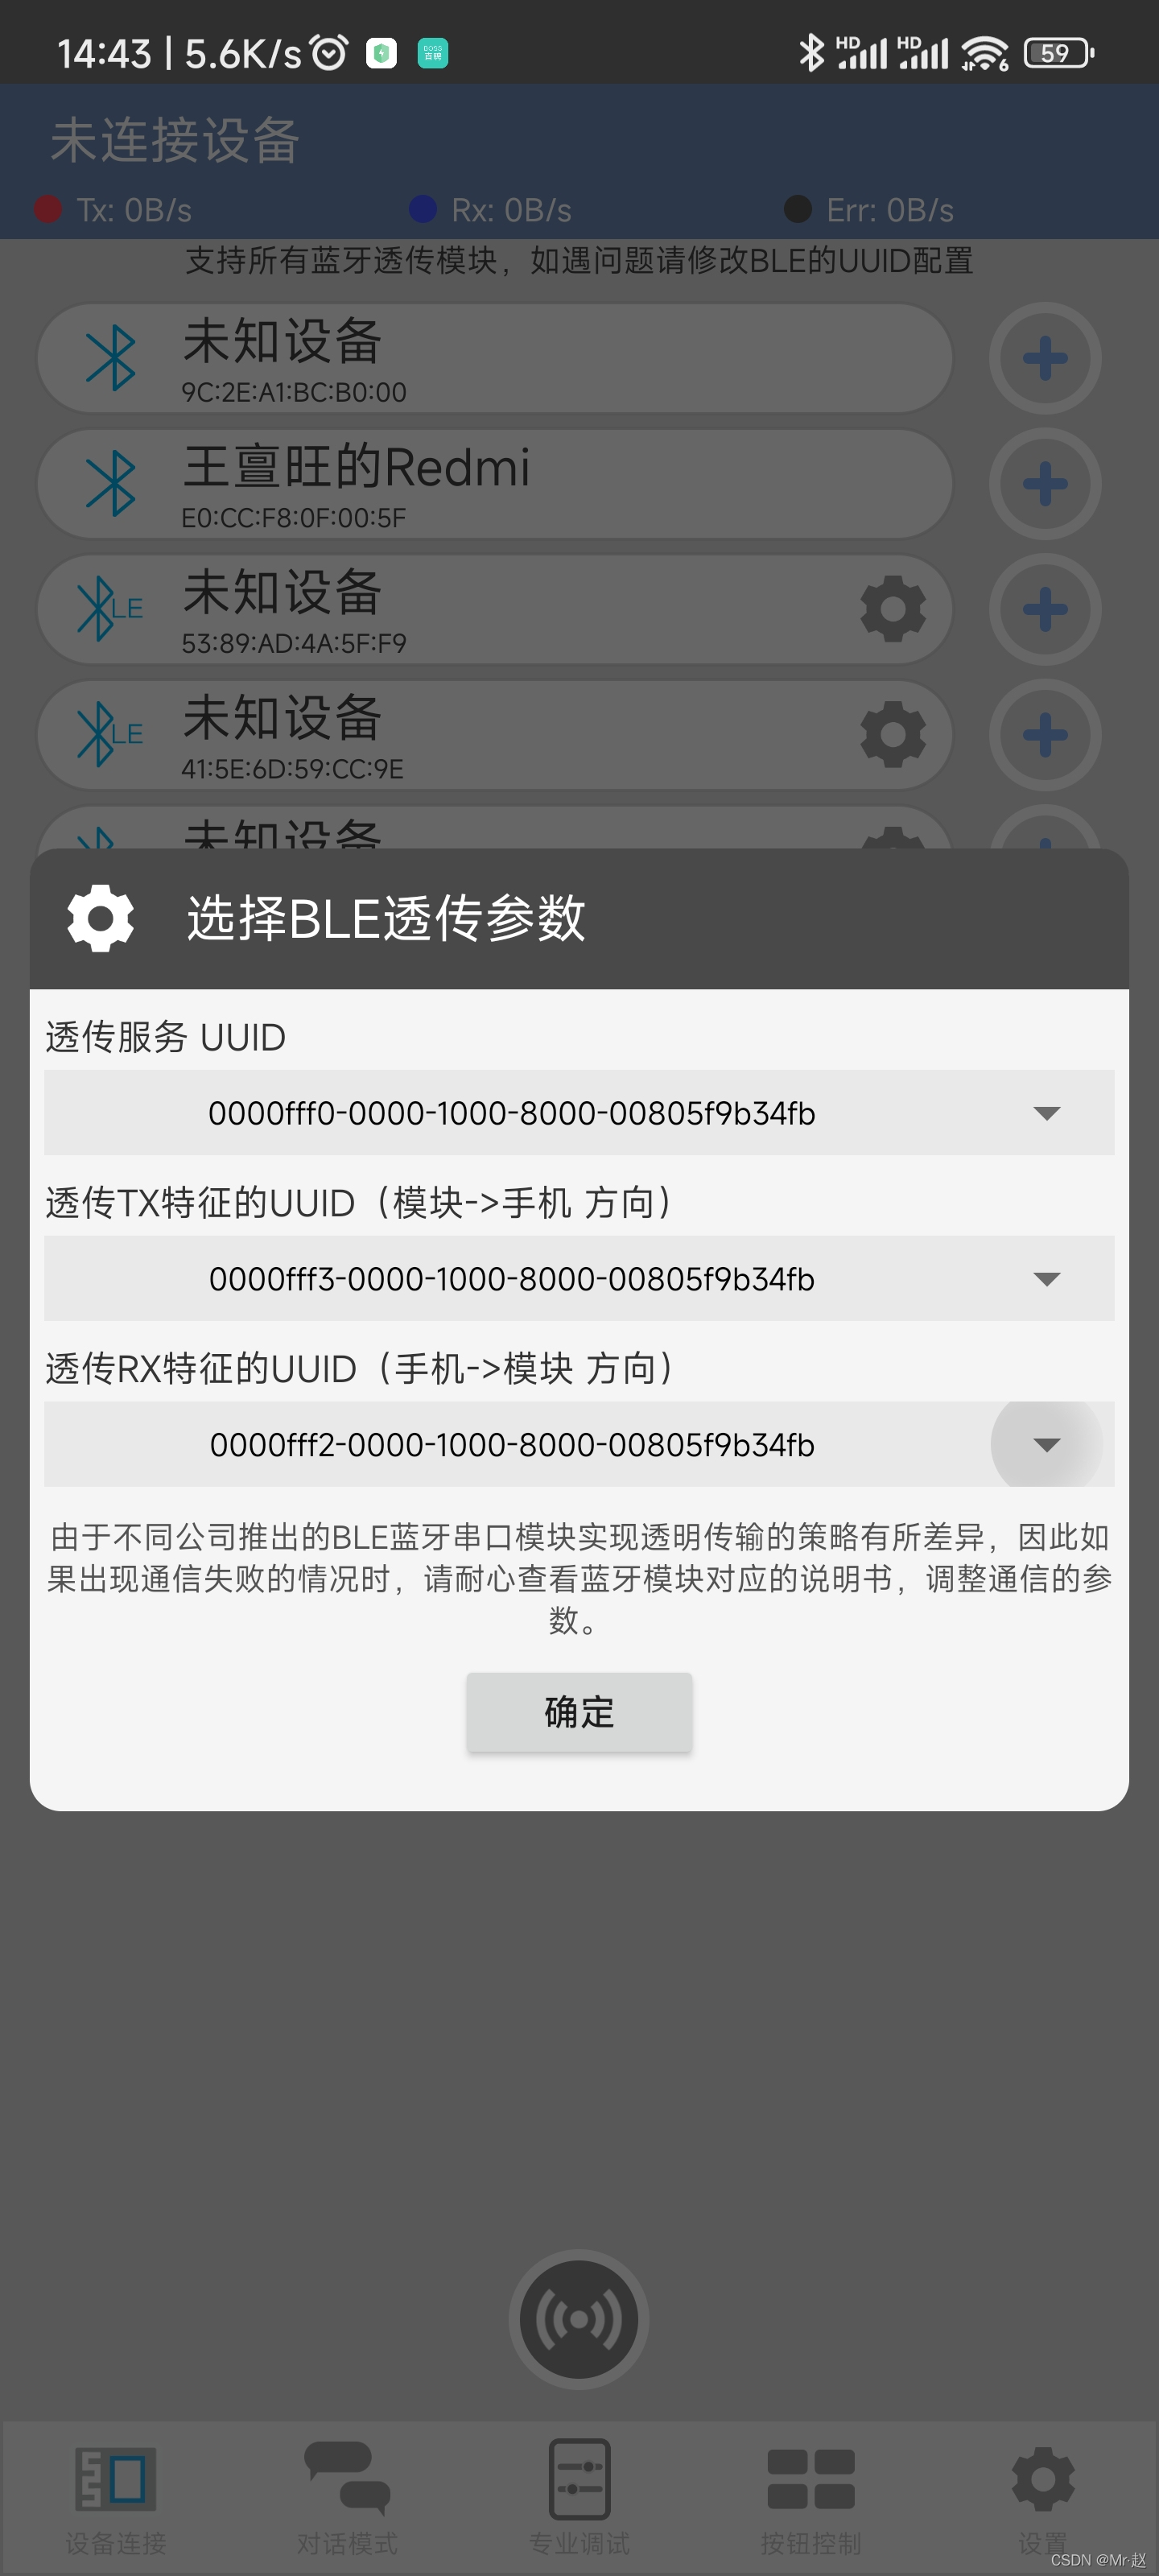
按照如圖所示進行配置,==注意TX是xxxf3,RX是xxxf2==。配置完成正常收發程序即可。
其他測試步驟和上文一樣,不再贅述。
0 條評論


