W80X Arduino LED gradation
This example demonstrates how to use analogWrite () Function to gradient LED. AnalogWrite Use pulse width modulation (PWM) To quickly open and close the digital pins, There are different ratios between on and off, To achieve a gradient effect.
necessity
- 1 x breadboard
- 1 x W801 plate
- 1 x LED The lamp (Or you can not use it, It's on the development board)
- 1 × 330Ω resistance
- 3 × Jumper wire
Wiring diagram
Connect the components on the breadboard according to the circuit diagram, As shown in the following picture. 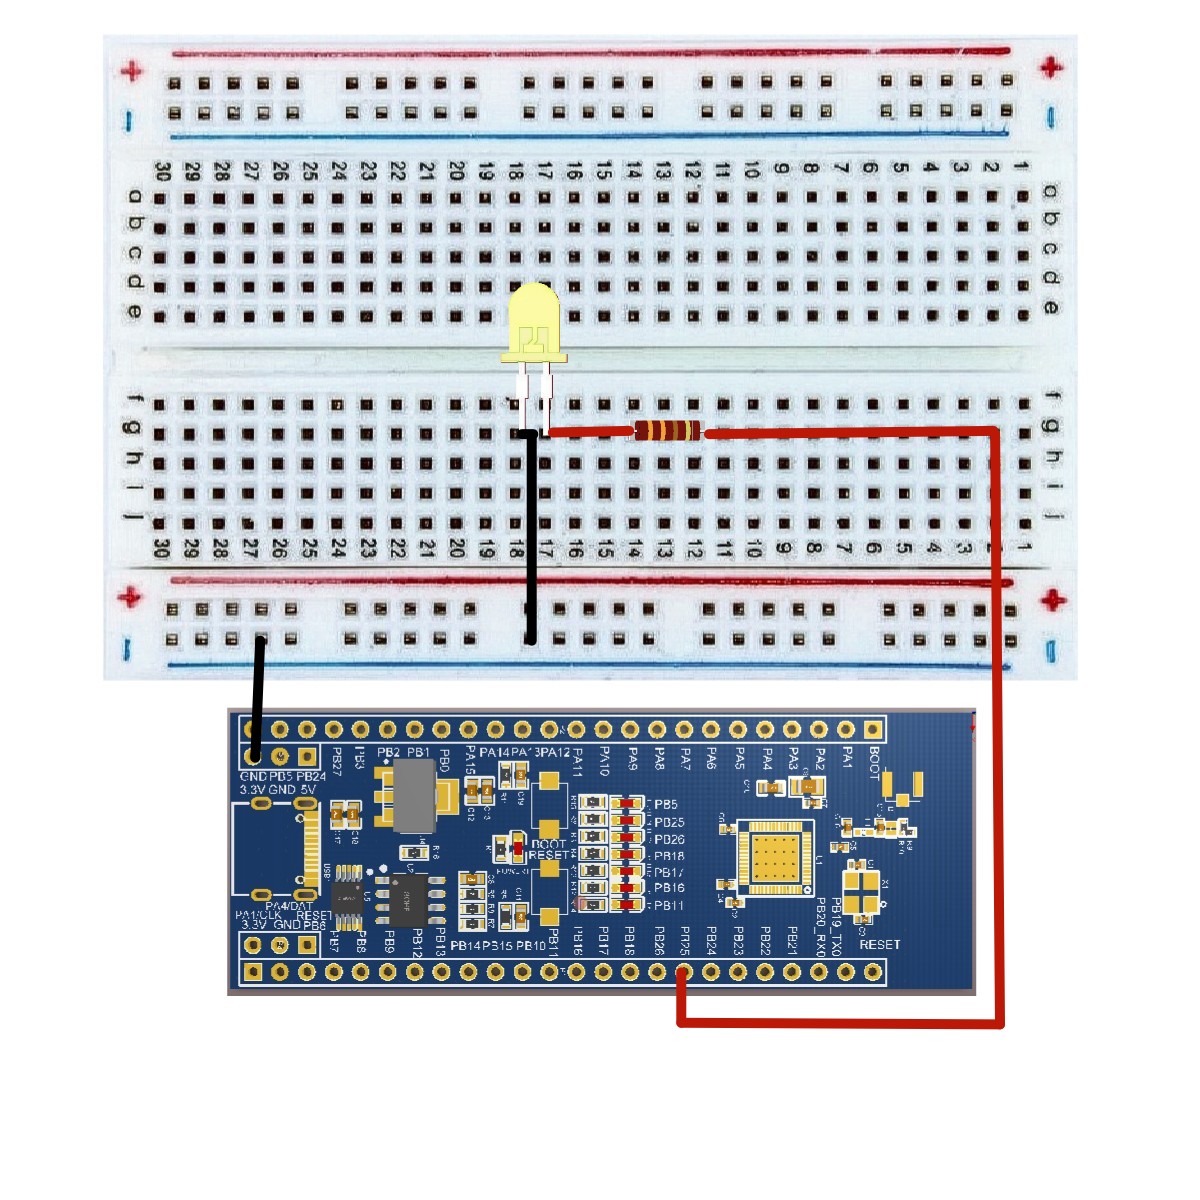
Rough sketch
Open it on your computer Arduino IDE software. Use Arduino Language encodes and controls the circuit. tap "new" Open the new sketch file. Specific configurations are not discussed here. 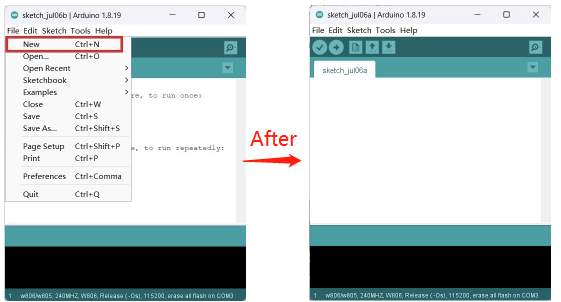
CODE
/*
   Fade
   This example shows how to fade an LED on pin PB24 using the analogWrite ()  function.
   The analogWrite ()  function uses PWM,  so if you want to change the pin you're using,
   besure to use another PWM capable pin. For example, PB25, PB26, PB20, etc.
*/
int led = PB25;  // the PWM pin the LED is attached to.
int brightness = 0;  // how bright the LED is.
int fadeAmount = 5;  // how many points to fade the LED by.
// the setup routine runs once when you press reset:
void setup ()
{
   // declare pin PB25 to be an output:
   pinMode (led,  PWM_OUT) ;
}
   // the loop routine runs over and over again forever:

void loop ()
{
   // set the brightness of pin PB25:
   analogWrite (led,  brightness) ;
   // change the brightness for next time through the loop:
   brightness = brightness + fadeAmount;
   // reverse the direction of the fading at the ends of the fade:
   if  (brightness == 0 || brightness == 255)
   {
      fadeAmount = -fadeAmount ;
   }
      // wait for 3 milliseconds to see the dimming effect
   delay (30) ;
}
Code import procedure
First click Verify Verify that the code is correct

Then click Upload A save dialog box is displayed for uploading the code, Edit the file name in the appropriate location and save it

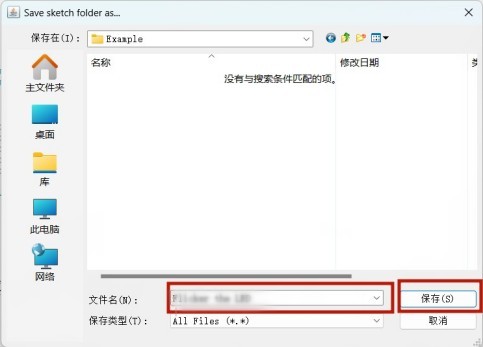
You can also do the following
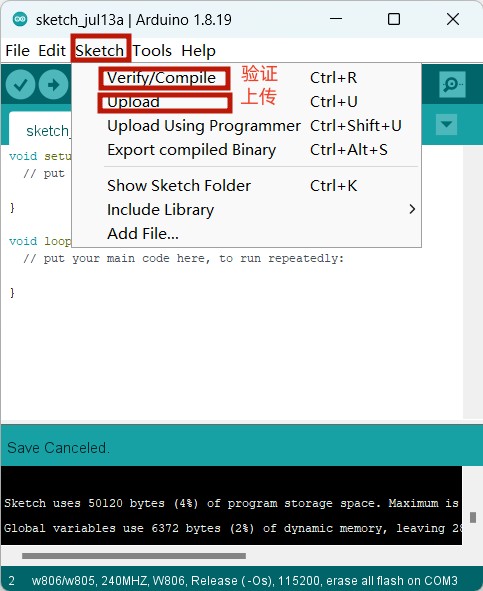
Finally, it takes more than ten seconds to upload, If the following is displayed, it indicates success

Code interpretation
pinMode (led, PWM_OUT) ; If you want to use PWM port, Please use PWM_OUTPUT or PWM_INPUT. In will pin PB25 Be declared as LED post-pin, in-code setup () There are no operations in the function.
analogWrite (led, brightness) ; You will use it in the main loop of your code analogWrite () The function will take two arguments: One tells the function which pin to write, The other is used to indicate what to write PWM value. In order to make LED Gradually close and open, gradually PWM Value from 0 (Stay closed) Increase to 255 (Open all the way) , Then return to 0 To complete the cycle.
In the sketch given above, PWM The value is used with a name called brightness Variable to set. Every time you go through the loop, It all adds variables fadeAmount The value of.
if brightness At any extreme of its value (0 or 255) , the fadeAmount Go negative. In other words, if fadeAmount is 5, So it's set to-5. If it is-5, So it's set to 5. Next pass cycle, This change will also result in brightness Change direction.
analogWrite () It can change very quickly PWM value, So the end of the sketch delay Control the speed of the gradient. Try to change delay The value of, See how it changes the gradient effect.
result
You can see yours LED Gradual change.

