W80X Arduino LED漸變
發布於 2023-07-13 16:58:08
這個例子演示了如何使用analogWrite()函數來漸變LED。AnalogWrite使用脈沖寬度調制(PWM)來快速打開和關閉數字引腳,在打開和關閉之間具有不同的比率,以實現漸變效果。
必需品
- 1 x 面包板
- 1 x W801板
- 1 x LED燈(或者你可以不使用,開發板上有)
- 1 × 330Ω 電阻
- 3 × 跳線
接線圖
根據電路圖連接面包板上的元件,如下圖所示。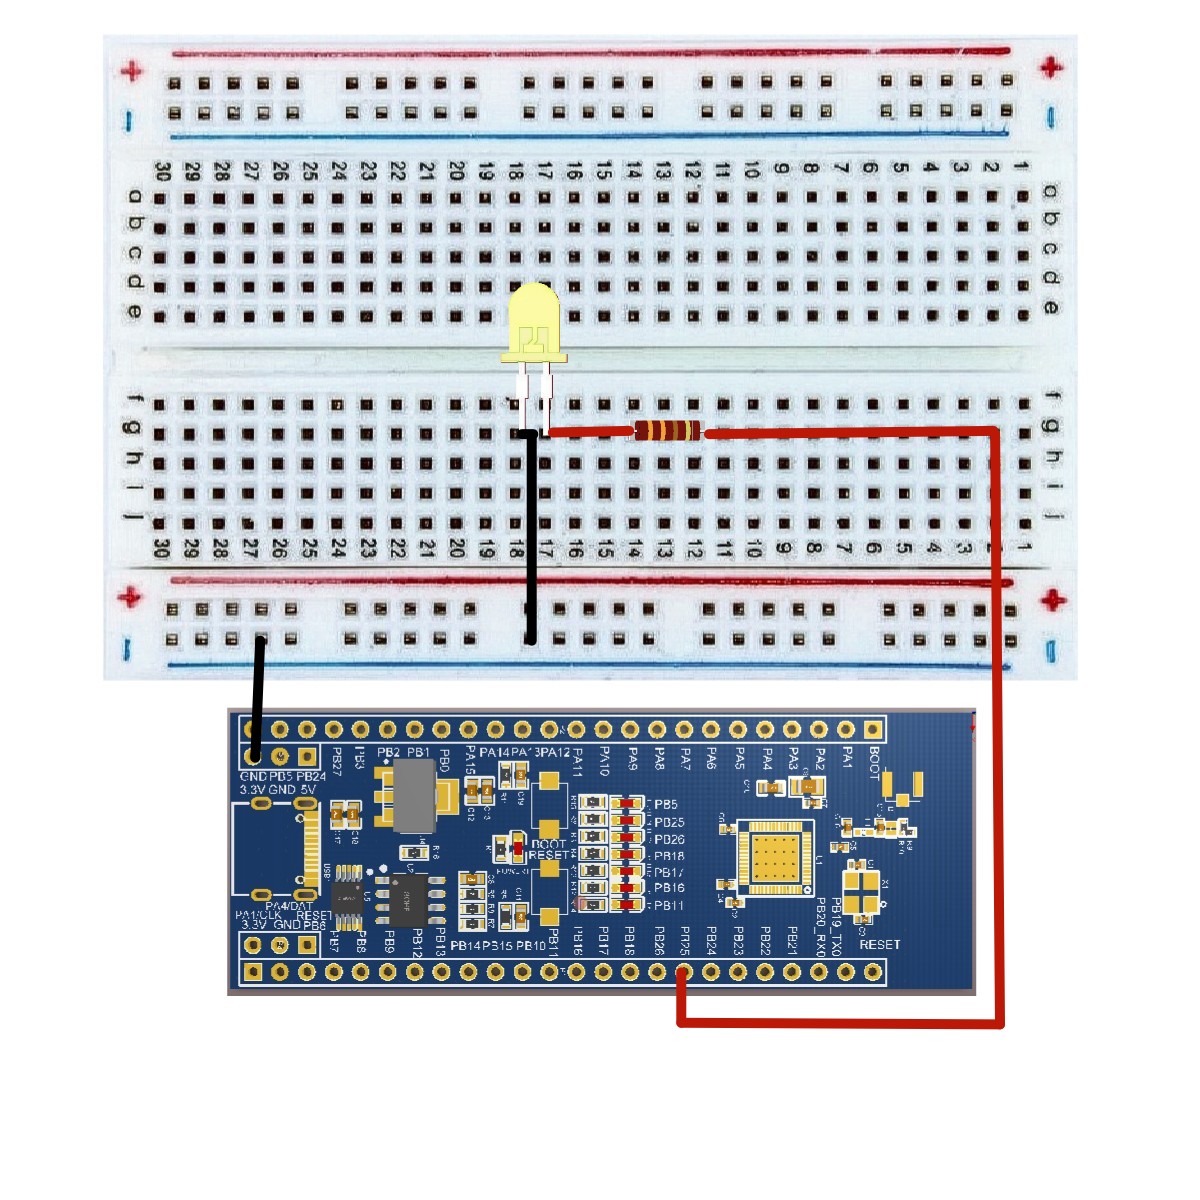
草圖
在計算機上打開Arduino IDE軟件。使用Arduino語言對電路進行編碼和控制。點擊“新建”打開新建草圖文件。這裡不討論具體的配置。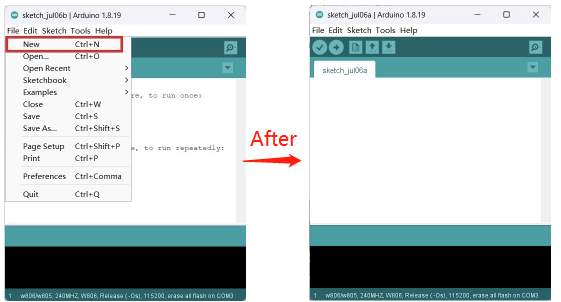
代碼
/*
   Fade
   This example shows how to fade an LED on pin PB24 using the analogWrite() function.
   The analogWrite() function uses PWM, so if you want to change the pin you're using,
   besure to use another PWM capable pin.For example,PB25,PB26,PB20,etc.
*/
int led = PB25; // the PWM pin the LED is attached to.
int brightness = 0; // how bright the LED is.
int fadeAmount = 5; // how many points to fade the LED by.
// the setup routine runs once when you press reset:
void setup()
{
   // declare pin PB25 to be an output:
   pinMode(led, PWM_OUT);
}
   // the loop routine runs over and over again forever:

void loop()
{
   // set the brightness of pin PB25:
   analogWrite(led, brightness);
   // change the brightness for next time through the loop:
   brightness = brightness + fadeAmount;
   // reverse the direction of the fading at the ends of the fade:
   if (brightness == 0 || brightness == 255)
   {
      fadeAmount = -fadeAmount ;
   }
      // wait for 3 milliseconds to see the dimming effect
   delay(30);
}
代碼導入步驟
首先單擊Verify驗證代碼是否正確

接著單擊Upload上傳代碼彈出保存框,在相應的位置編輯文件名並保存即可

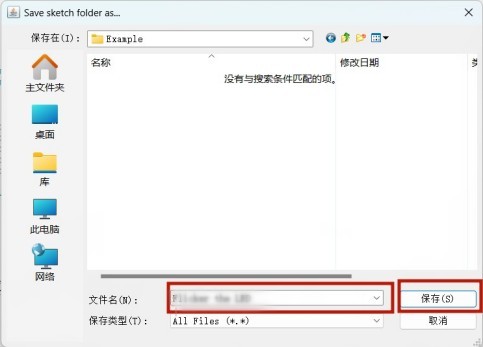
也可以如下步驟
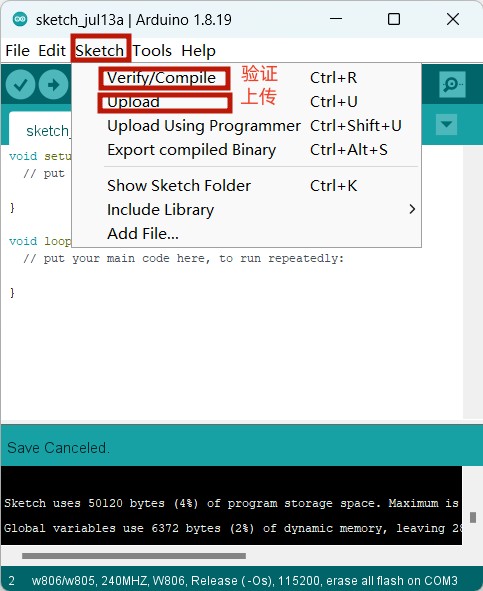
最後等待上傳需要十幾秒的時間,顯示以下即表示成功

代碼解釋
pinMode(led, PWM_OUT);如果您想使用PWM端口,請使用PWM_OUTPUT或PWM_INPUT。在將引腳PB25聲明為LED引腳之後,在代碼的setup()函數中沒有任何操作。
analogWrite(led, brightness);您將在代碼的主循環中使用的analogWrite()函數將接受兩個參數:一個用於告訴函數要寫入哪個引腳,另一個用於指示要寫入的PWM值。為了使LED逐漸關閉和打開,逐漸將PWM值從0(一直關閉)增加到255(一直打開),然後返回到0以完成循環。
在上面給出的草圖中,PWM值是使用一個稱為brightness的變量來設置的。每次通過循環時,它都會增加變量fadeAmount的值。
如果brightness處於其值的任一極值(0或255),則fadeAmount變為負值。換句話說,如果fadeAmount是5,那麼它被設置為-5。如果它是-5,那麼它被設置為5。下一次通過循環,這個改變也將導致brightness改變方向。
analogWrite()可以非常快速地改變PWM值,因此草圖結束時的delay控制了漸變的速度。嘗試改變delay的值,看看它如何改變漸變效果。
結果
你可以看到你的LED逐漸變化。
0 條評論

